Collaborative Grid Drawings 9/19/13
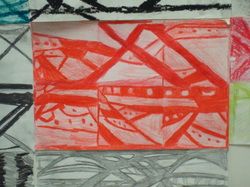
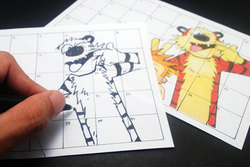
After we finished our individual grid drawings, we started a collaborative project where each student received a piece of a picture. They then used a grid to figure out where the lines and shadows on their piece went off the edge of the paper. I likened it to each of them having a piece of a puzzle, and to goal was to get them to be able to assemble the puzzle at the end. The original picture was in black and white, but the student were encouraged to use whichever colors they wanted. They drew the type of media they could use out of a bucket, and so some students had to use materials that they were not familiar with, or that were not what they would have used if they had a choice! When everyone was done, we assembled our big picture out in the hall for everyone to see. The students all agreed that it was much harder to us a grid system when you don't know what the pieces next to yours are going to look like! I think they decided that the first grid drawings they did were they easier way to do it:)


Here are some close ups of some individual cells. These students did a WONDERFUL job at placing their lines! They are very close to exact matches to the person next to them.


Grid Drawings 9/6/13
We will be starting out the Trimester with Grid Drawings. These are drawings using a grid system to replicate an existing picture. Grids are used to divide the original picture into small squares. A grid is added to the blank paper as well. The grids do not have to be the same size! In this class we will be using larger squares on our blank sheet, but in later grades the students will be learning about distortion grids (which will change the picture greatly)! Everything in each original square will then be replicated over to the corresponding square on the blank sheet. Doing this will help the artist accurately transfer the picture.


