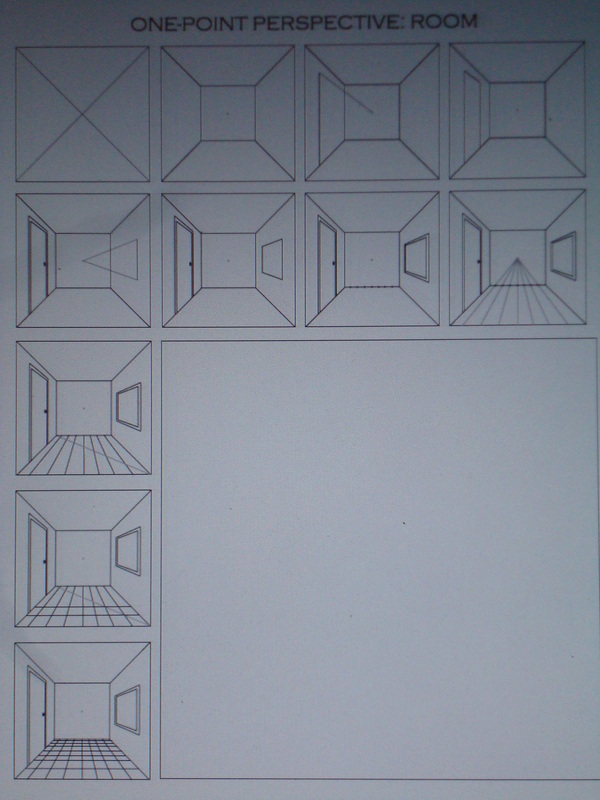
One Point Perspective 9/27/13
We started out this project by learning about what is necessary in a one point perspective drawing. Perspective is all about how we as humans see
things. We see things differently than animals and insects...both in colors and in how many eyes we have! We also see things differently
depending on where we are looking. If we are on the ground, things will look really different from if we were looking down at them from the
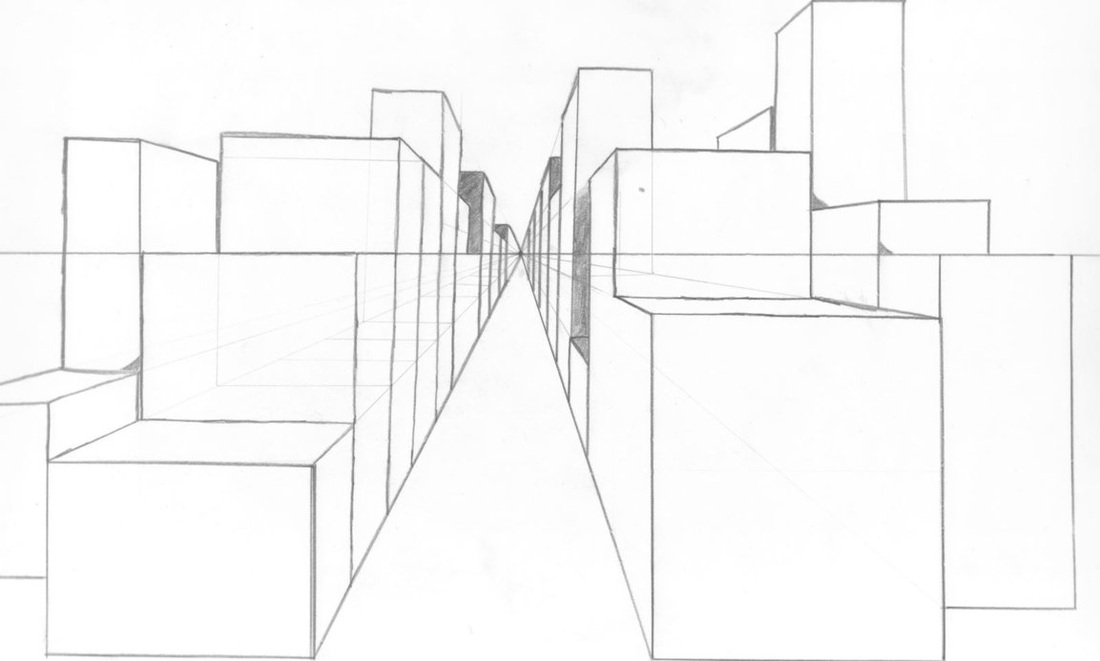
sky. When looking at something from a one point perspective, it means that everything seems to go backwards in the picture plane to almost disappear into ONE vanishing point. We can create this illusion by drawing in the horizon line, adding in our vanishing point, and then using
orthogonal lines to show objects getting smaller as they seen to get further away. We will be doing practice cityscapes and interiors, then
moving onto using perspective in graffiti lettering.
things. We see things differently than animals and insects...both in colors and in how many eyes we have! We also see things differently
depending on where we are looking. If we are on the ground, things will look really different from if we were looking down at them from the
sky. When looking at something from a one point perspective, it means that everything seems to go backwards in the picture plane to almost disappear into ONE vanishing point. We can create this illusion by drawing in the horizon line, adding in our vanishing point, and then using
orthogonal lines to show objects getting smaller as they seen to get further away. We will be doing practice cityscapes and interiors, then
moving onto using perspective in graffiti lettering.
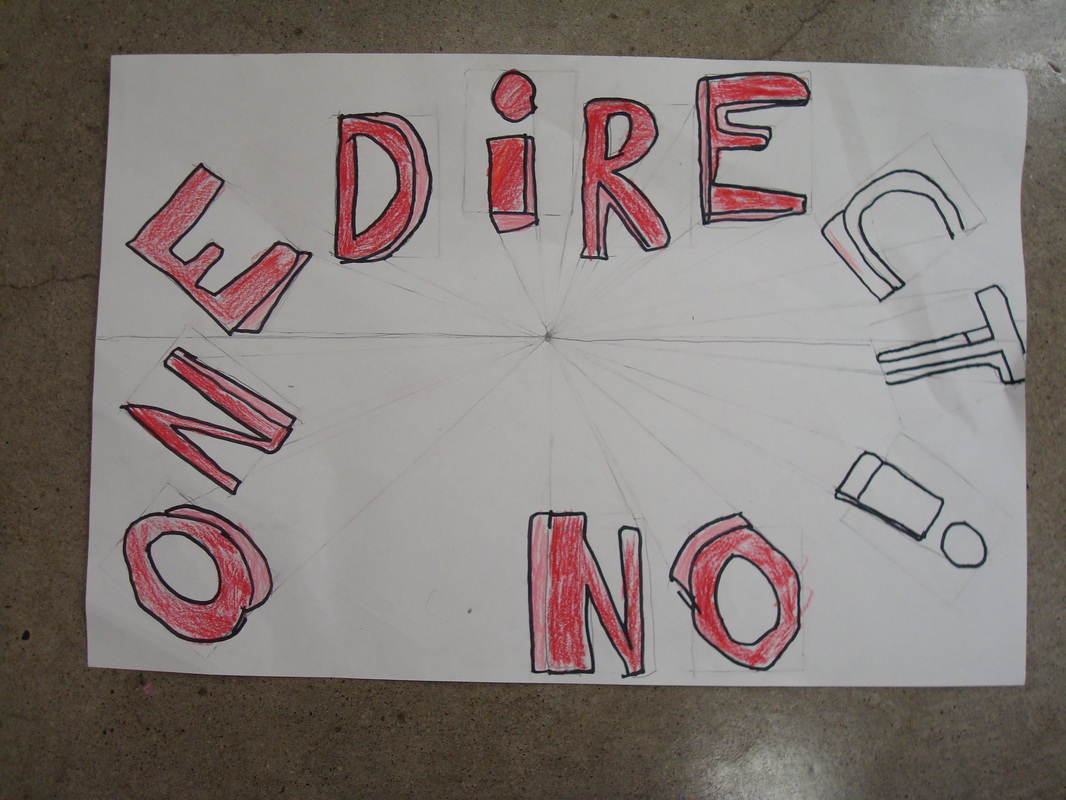
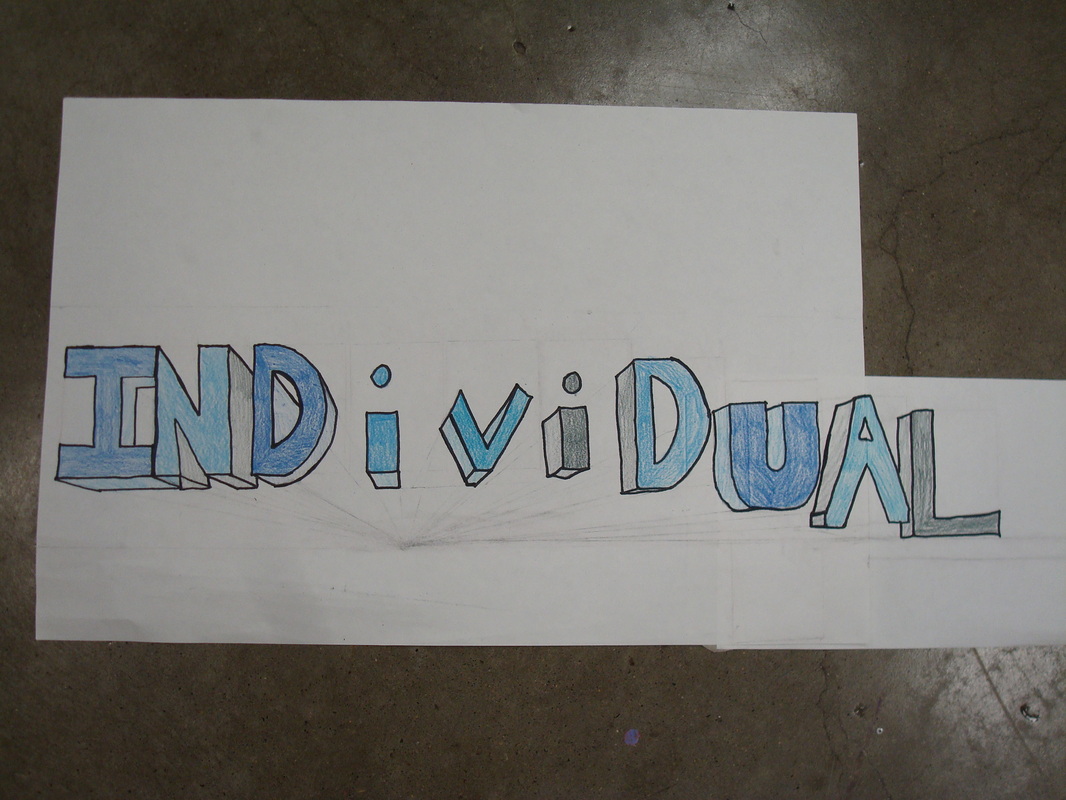
One Point Perspective Letters 10/1/13
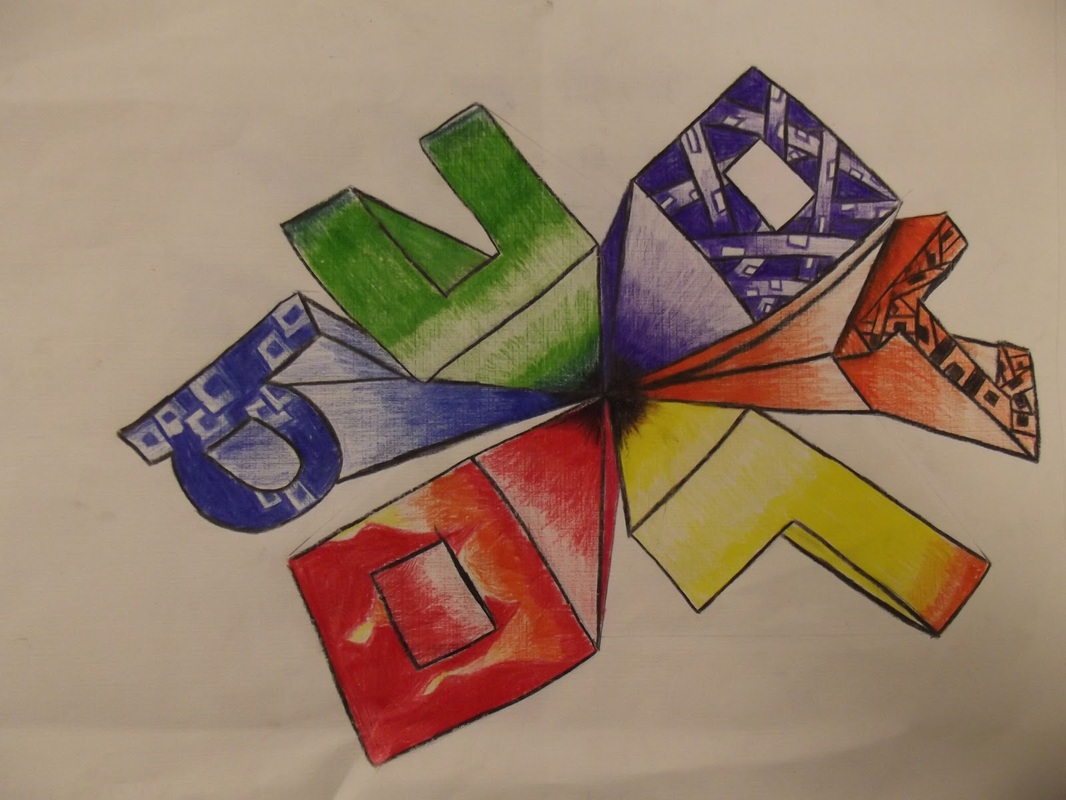
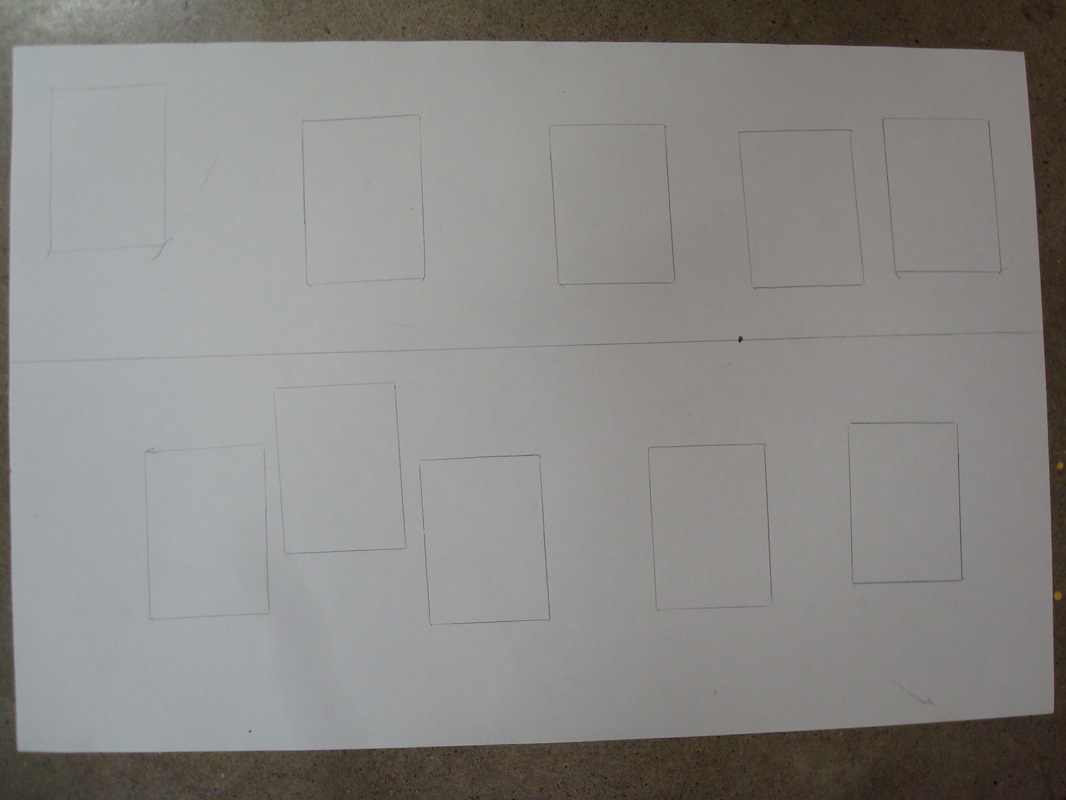
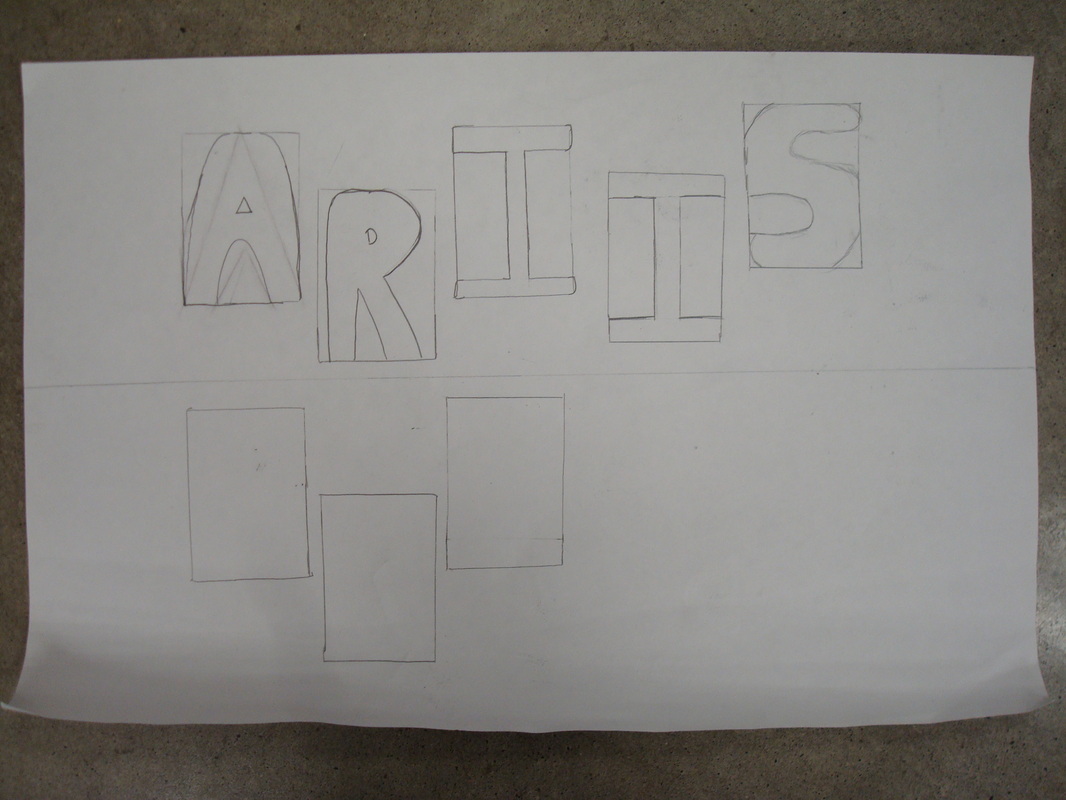
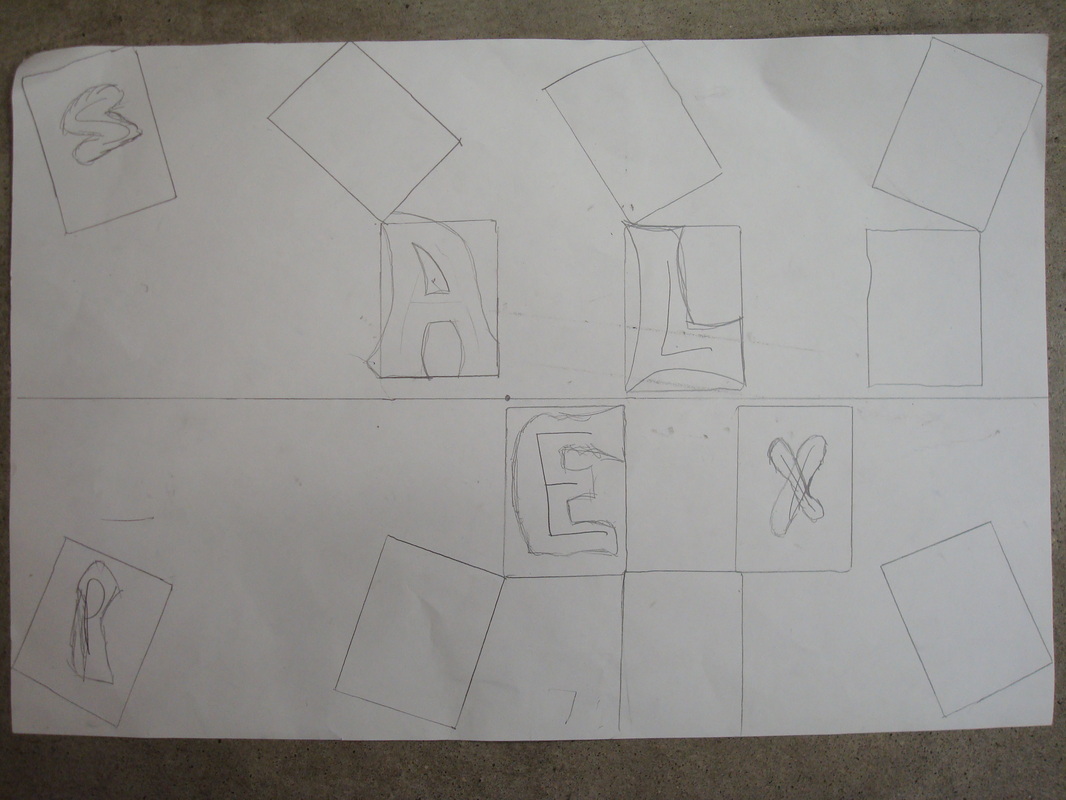
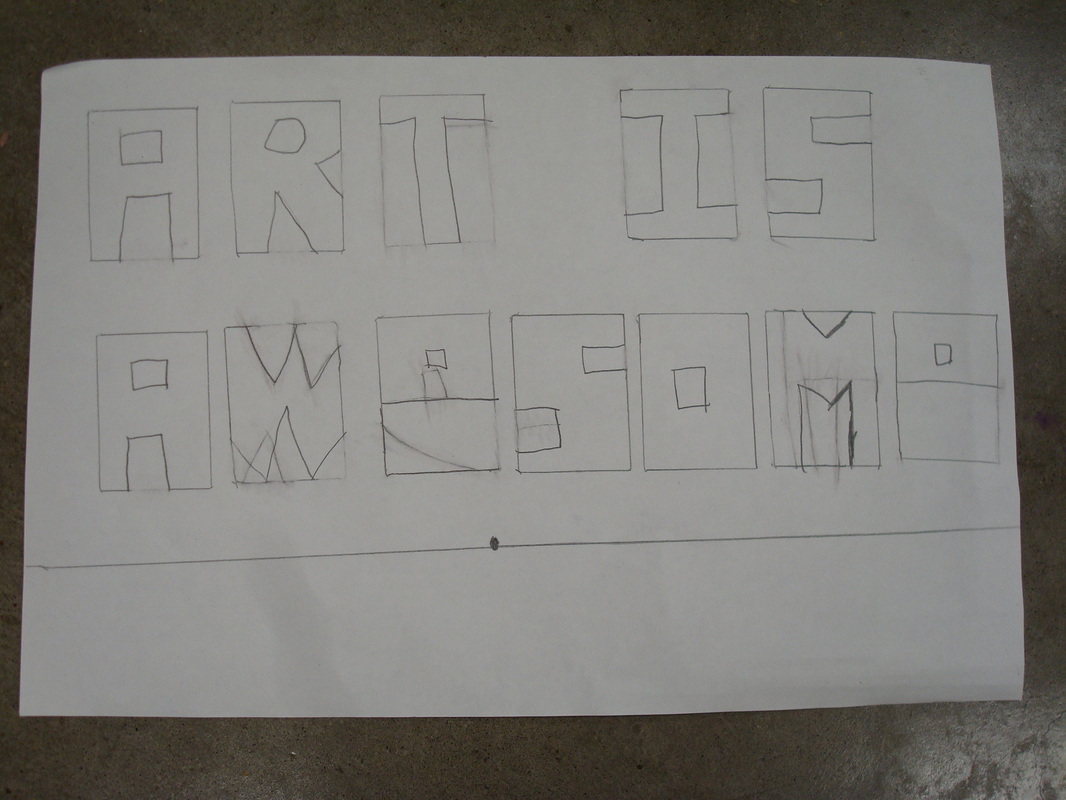
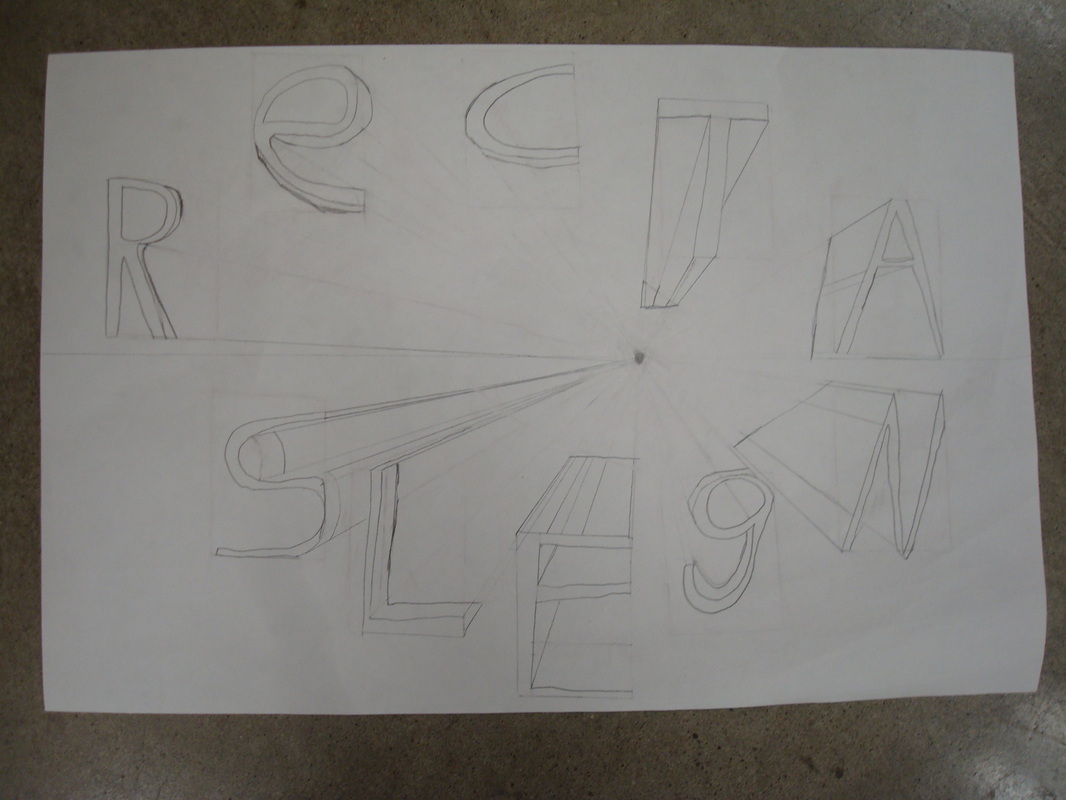
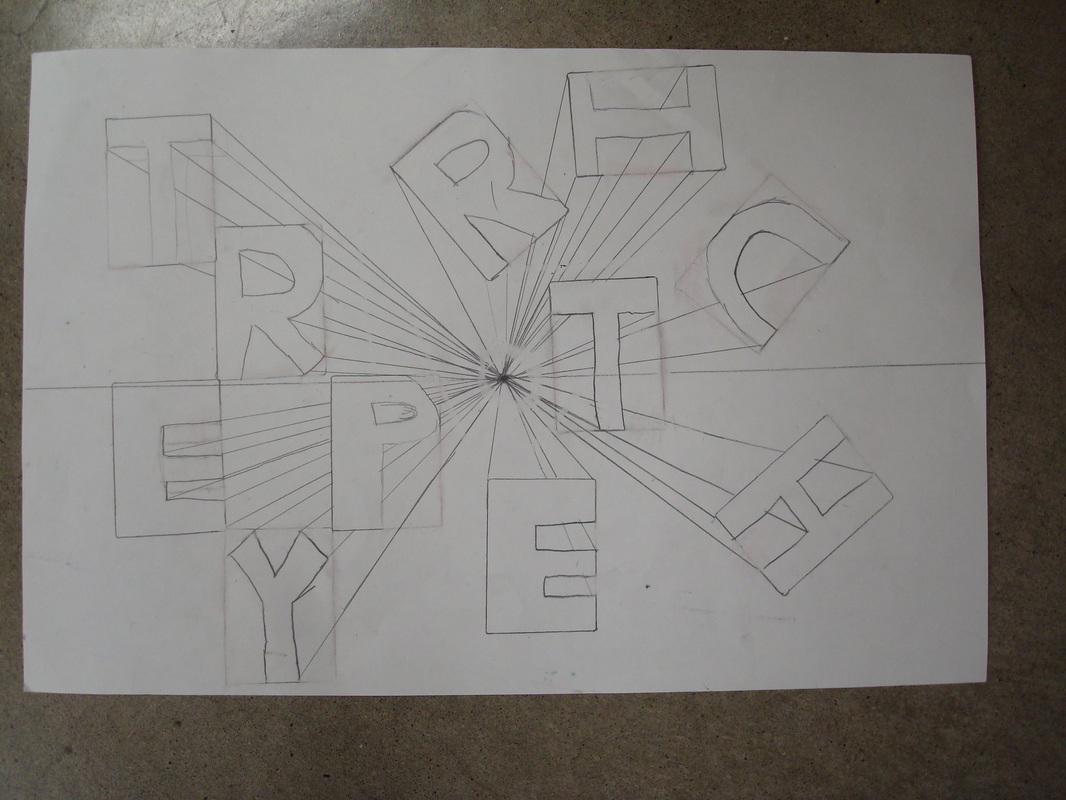
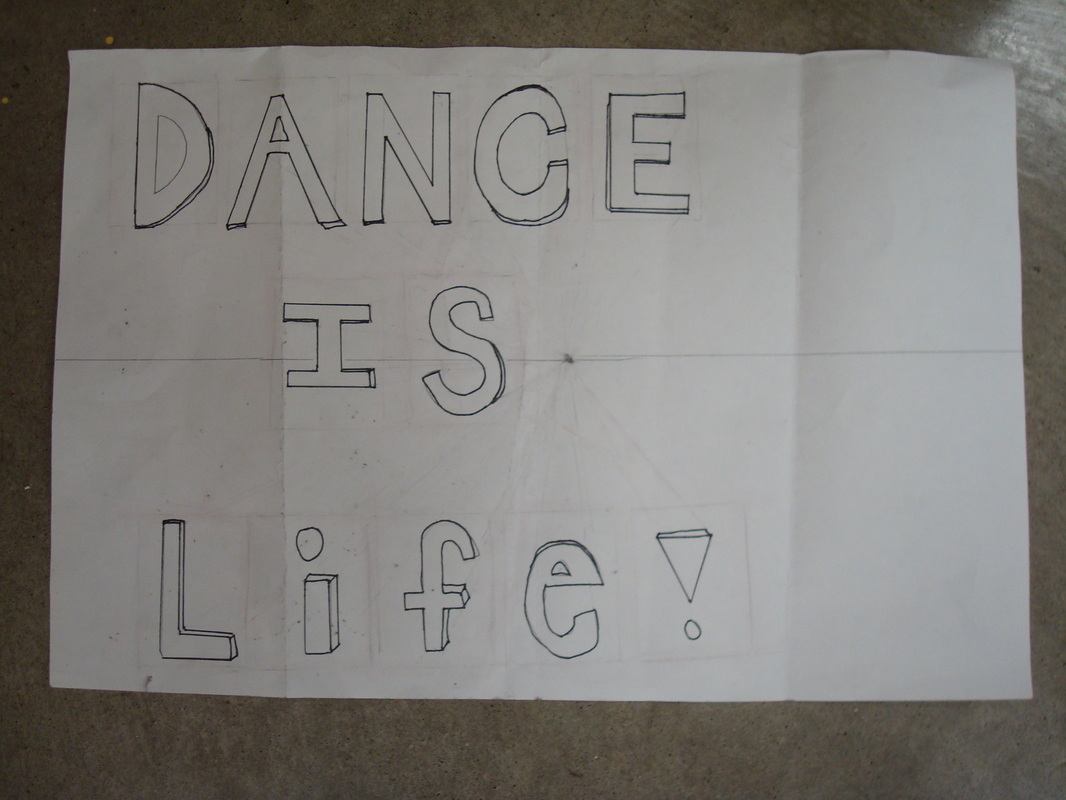
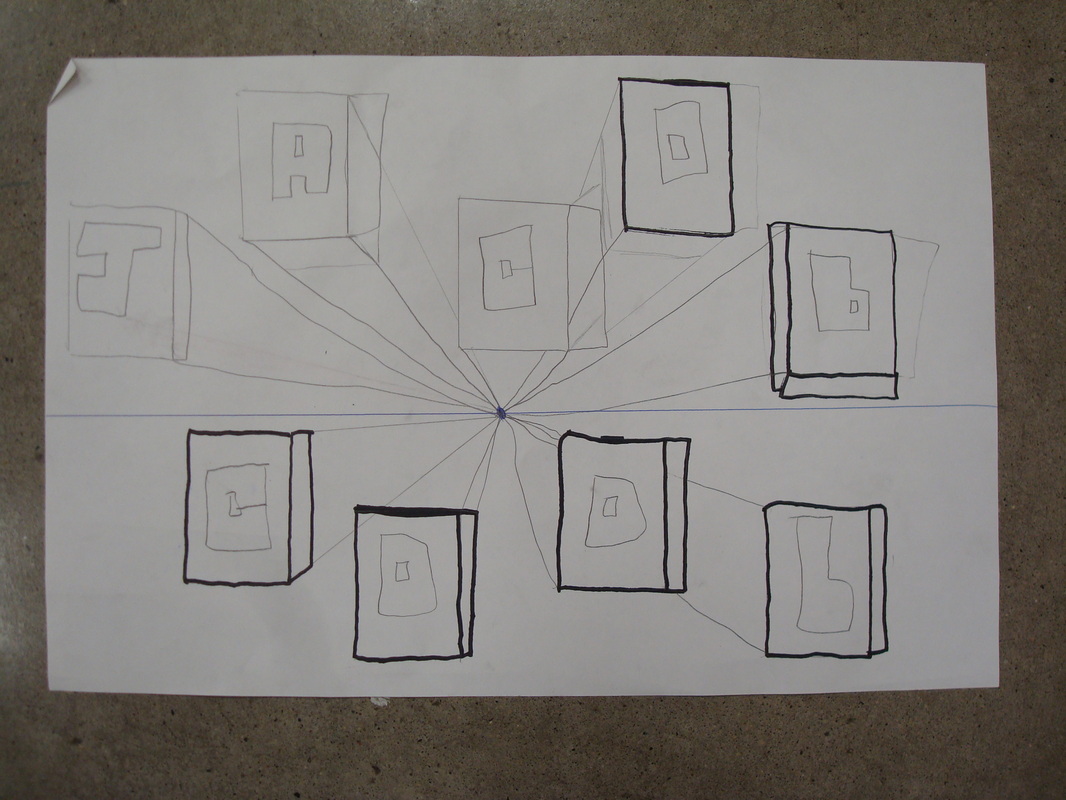
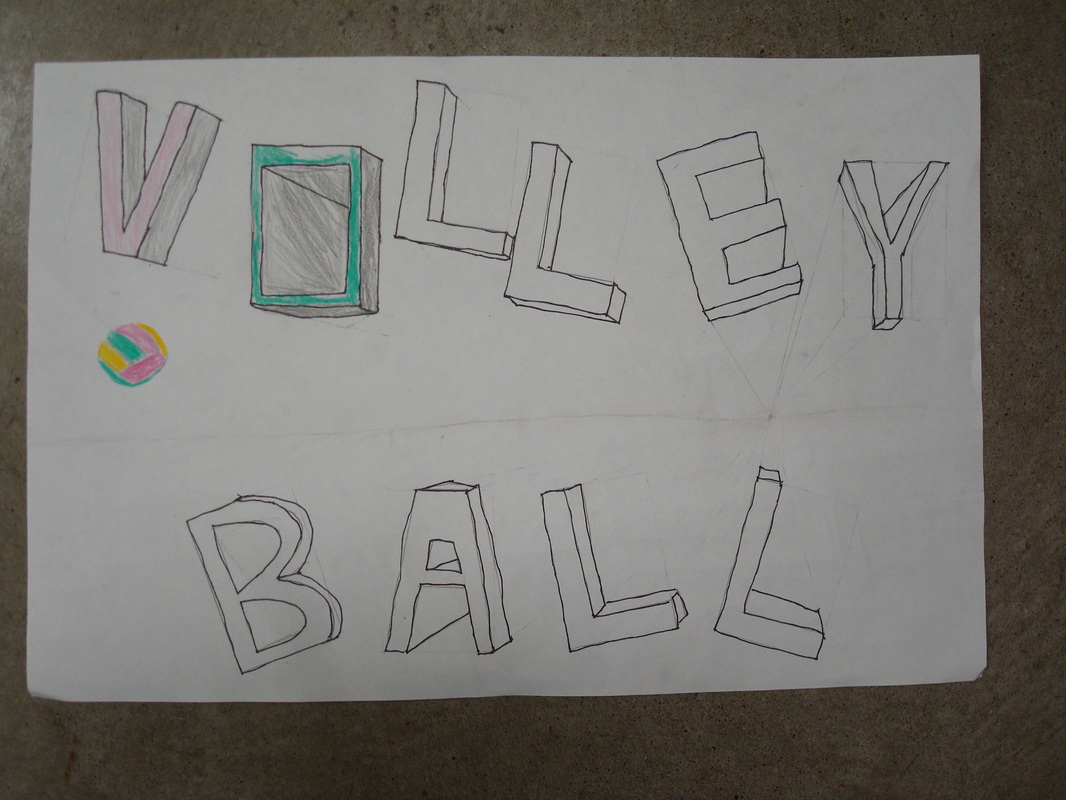
Students were instructed to find a word or phrase that had 10 or more letters in it to use with this project. We had some students use their names, and others had a quote or phrase that they really liked. We started out with a HORIZON LINE and VANISHING POINT on our paper. We then traced rectangles onto our page, enough for each letter. This helped us create letters that were of a similar size. Students made block/bubble letters in each rectangle. Some students decided to use some graffiti style lettering that we had learned about earlier in the week! After they had created their basic letter shape, we started to connect each corner and curve to our vanishing point. This is how we gave our letters the illusion that they were going into the distance. Students then had to cut off their letters near the original letter, and erase the remaining ORTHOGONAL LINE. This is how we were able to make our letters look as though they were 3-D. The students traced the outline of each letter in Sharpie, and then had to color in their letters with the darker, more bight colors on the face of the letter, and the lighter, more faded colors along the sides, top, and bottom. They could then do any background they wished.

Final Projects!! Some of these turned out absolutely AMAZING:
